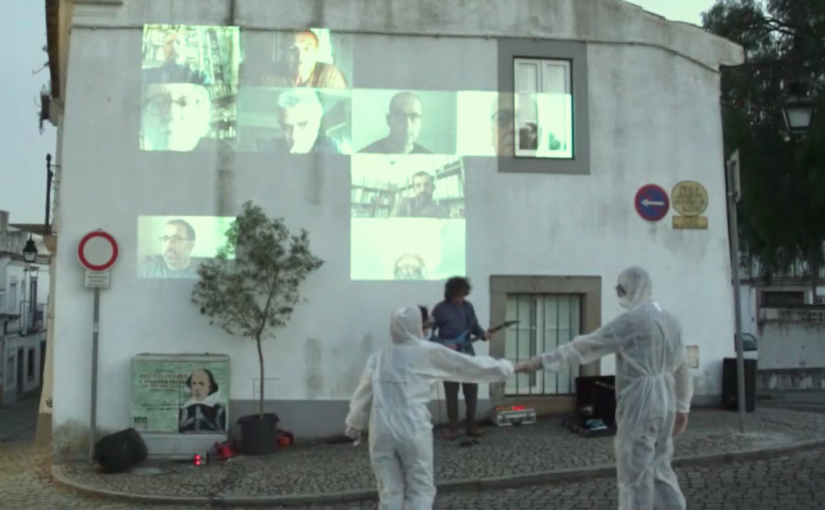
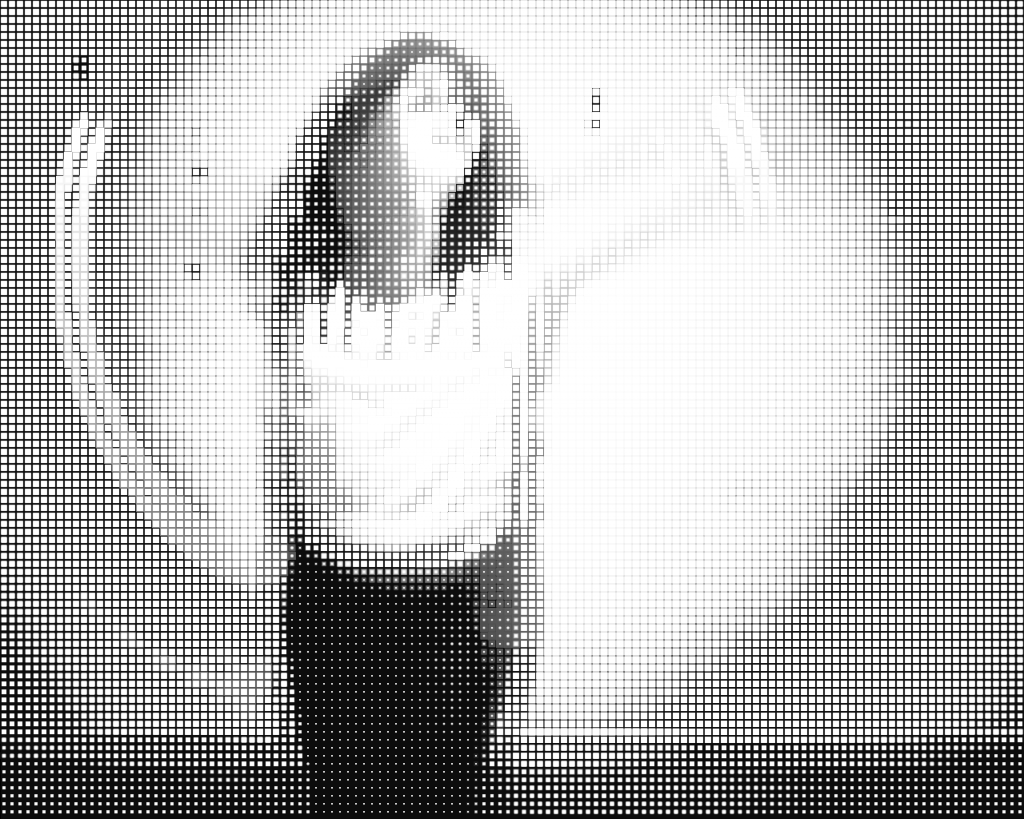
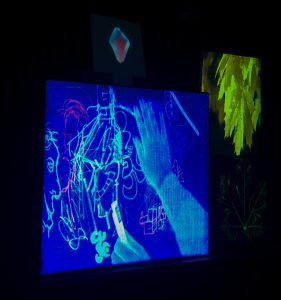
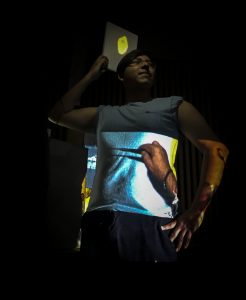
Performance Art during first COVID19 shut-down. A thought about the individual and industrial confinement which in days has changed the environmental footprint of mankind. which in days has become a void for thousands of arts and culture people.
Made up of three acts:
The One Last Hug – representing the social estrangement that current generations had never experienced before. Suddenly everything is dangerous; the closeness; the touch; the unknown. Separation without farewells.
The Tip – Suddenly artists depend more than ever on support to survive. All stage cultural activity is suspended. Longing for government support.
The Saw – the ecological footprint of the halting of human activity made itself apparent in the satellite images. Within weeks the air became cleaner, noise attenuated, skies clearer. Then what? When we no longer need masks?
By Joao Espanca Bacelar Music: João Cágado | guest artist: André Sier | co-performer: Claudia Silvano Video Contributions: Carlos Moura Carvalho, Carla Dias, Vítor Moreira, José Russo, Feliciano Mira, Telmo Rocha, António Gavela, Lurdes Nobre, António Carrapato, Gonçalo Oliveira, Manuel Dias, Greg Moore, Alípio Carvalho Neto, Hugo Osga, Rodrigo Fonseca, Vítor Zambujo, Rosario Gonzaga, Pedro Rodrigues, Pedro Fazenda, Mariana Mata Passos. Drone operator: Rui Fernandes – GMT Produções, Audio: Manuel Chambel May, 21st 2020, Évora, Portugal
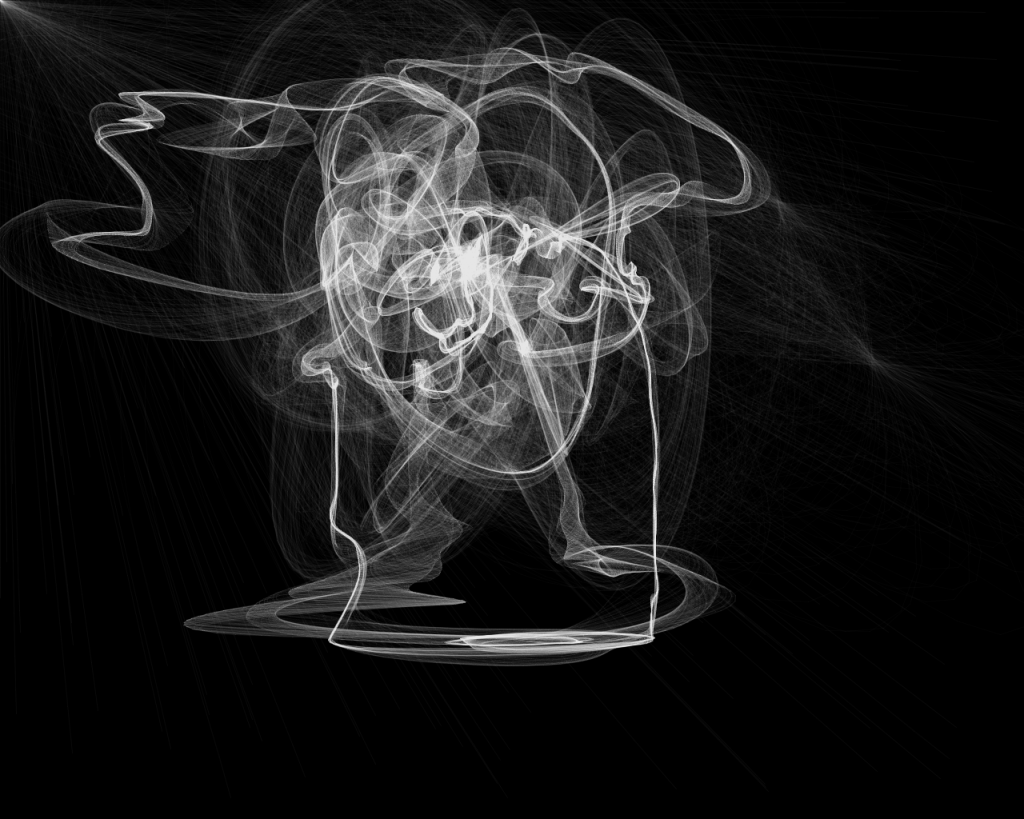
WIPHALA is the symbol that represents the union and independence of the peoples of the Andes.
The expression’s origin is in the words of the language Aymara Eiphay. An expression of joy, and phalax, which is the dream produced by flying a flag.
Generative graphics exploration from Wiphala to the Museo de Arte Contemporáneo Plaza – Bolivia. Thoughts about the rights of the Andean peoples.
The colours originate from the rainbow, as a reference to Andean ancestors, to show the composition and structure of the emblems and organise the community and harmonic society of the Andes.
Wiphala is property of the original nations. For the Quíchuas and Aimarás, the Wiphala is the expression of Andean philosophical thought, and its content expresses the development of science, technology and art, it is also the dialectic expression of Pacha-Kama and Pacha-Mama, an image of organisation and harmony of brotherhood and mutuality in the Andes. That is why the Wiphala is sacred, and corresponds to spread and defend the meanings of the problem throughout the Andean area, both in Ecuador, Peru and Bolivia, showing the problems of the world, the territorial, national and cultural identity. Its management and use must be permanent and consistent.
Red: It stands for the Planet Earth (aka-pacha), it is the expression of Andean man, in the intellectual aspect, it is the cosmic philosophy in the thought and knowledge of the Amawatas.
Orange: Represents society and culture, that of culture, also expresses the preservation and procreation of the human species, considered the nation’s most appreciated patrimonial wealth, health and medicine, training and education, the cultural practice of the dynamical youth.
Yellow: Expresses the energy and strength (ch’ama-pacha), it’s the expression of the moral principles of Andean people, it’s the doctrine of Pacha-Kama and Pacha-Mama: Duality (chacha-warmi) are the laws and norms, the collective practice of brotherhood and human solidarity.
White: it represents time (jaya-pacha), it is the expression of the development and permanent transformation of Quallana Marka on the Andes, and the development of science and technology, and art, and intellectual and manual work that generates reciprocity and harmony within the community structure.
Green: It represents the Andean economy and production, it is the symbol of natural wealth, of the surface and subsoil, it represents land and territory, and even agricultural production, flora and fauna, hydrological and mineral reserves.
Blue: represents the cosmic space, the infinite (araxa-pacha), is the expression of the star systems of the universe and the natural effects that are on the earth, is astronomy and physics, socio-economic organization, political and cultural, is the law of gravity, natural dimensions and phenomena.
Violet: It represents the Andean politics and ideology, it is the expression of community and harmonic power of the Andes, the instrument of the state, as a higher station, which is the structure of power, the organisations, social, economic and cultural and the administration of the people of the country.
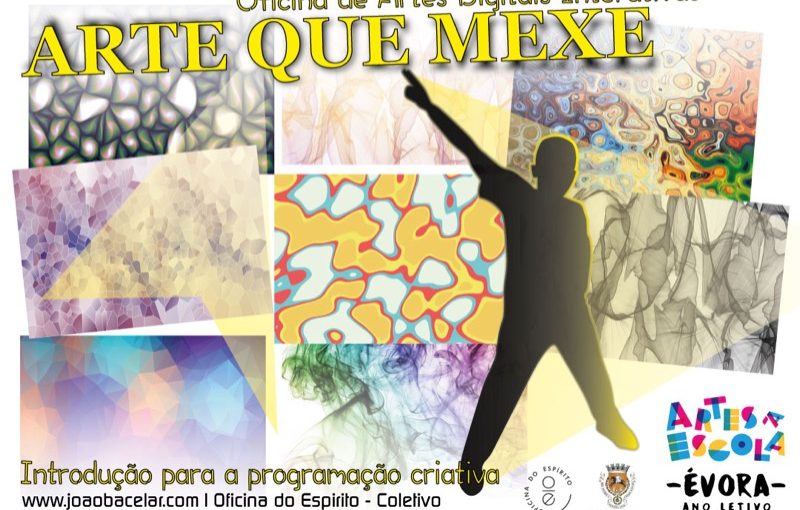
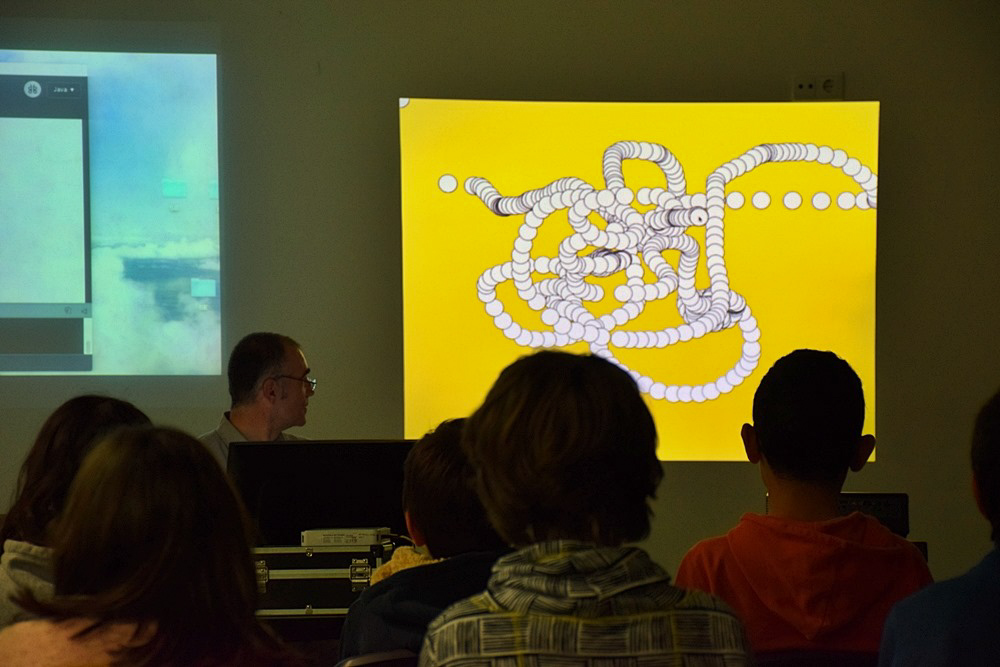
For this workshop has been used examples based on open source, free software and free hardware platforms. Initially thought for Processing and Raspberry Pi Arduino but soon it was realized that there would be no time to approach more than Processing. Each workshop consisted of two break times. Students already have UBBU-based programming classes per object, which makes it easier to bridge between platforms. Students watch and experiment. Illustrated explanation of operation, construction of a basic sketch with shapes, colors, creation of an object, movement and conditions, webcam interactivity. Intended to motivate to the new media arts by showing easy and accessible possibilities to the students’ reality. The students were left with a graphic work produced by them as a result of their participation.
6 workshops were programmed for 6 classes. Automatic registration for 5th grade for Programming and Robotics students, in this case at the André de Resende School.
The workshop was part of an Arts to School 2020 program of the Municipality of Évora
photo by Rosário Fernandes – CME
The plan I’ve prepared starts with the initial presentation of working examples I’ve been doing mainly with Processing, OpenFrameWorks and VPT (obviously there is more software and equipment involved). Description of the performance at Cante Acusmático de Pias in order to describe the technical plan of image capture, as well as other examples that we could see in operation such as Time-Windows and Silver Waters mapping device. Some art theory, trying to link aspects of generative art to aesthetics present in the history of art.
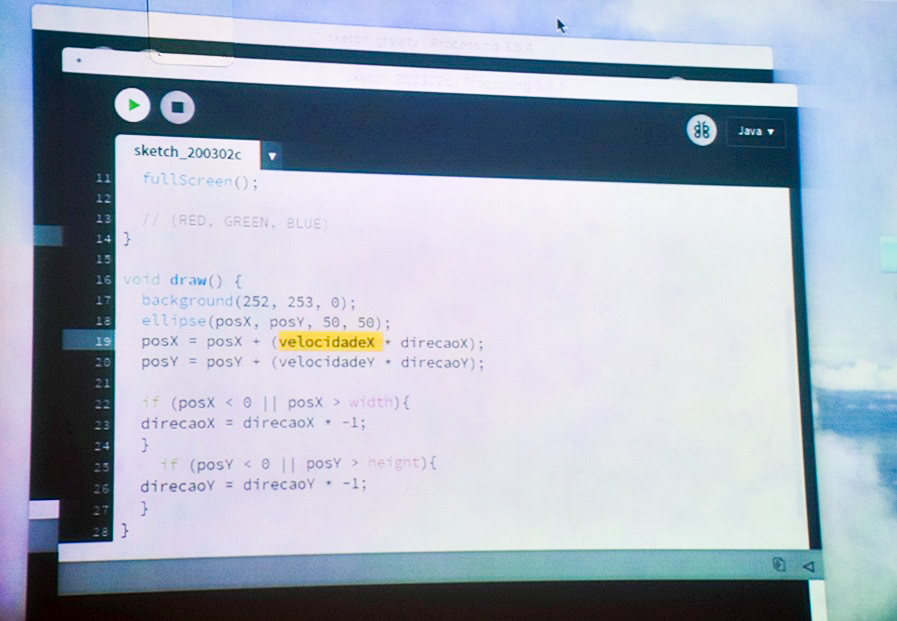
Scketch projetado.
In the first part of the workshops, the practical exhibition was based on the step-by-step construction of a sketch showing the connection with subjects that students already know of school education. We raised together a picture with an object that ended up moving by itself, interacting with the limits of the screen and with the mouse values. They helped to build and put into operation this physical structure based on the sum, subtraction, multiplication and inversion of values from negative to positive (direction inversion) based on simple conditions. We also approached color values by addition in RGB system.
I leave here some summary notes and the sketch that was built step by step in the workshop for any student who wants.
width, height, screen size, /2 /3 splitter ratios, etc.
Simple forms – rectangle, ellipse, Cartesian coordinate system.
Decimal and whole variables
IF conditions, > major and < minor. Etc.
Judging by the way the students participated, I think that these contents were easily perceived by the young people, and there was even information that had not yet been taught such as the additive color system, RGB, the negative numbers and the Cartesian system. As each workshop was proposed for two 50-minute lessons per class, in this first theoretical introduction no more material could be added. I always try to present this information inviting the participation of students so that it does not become a mass and passive exhibition, I think it has resulted, at least for these times.
photo by Rosário Fernandes – CME
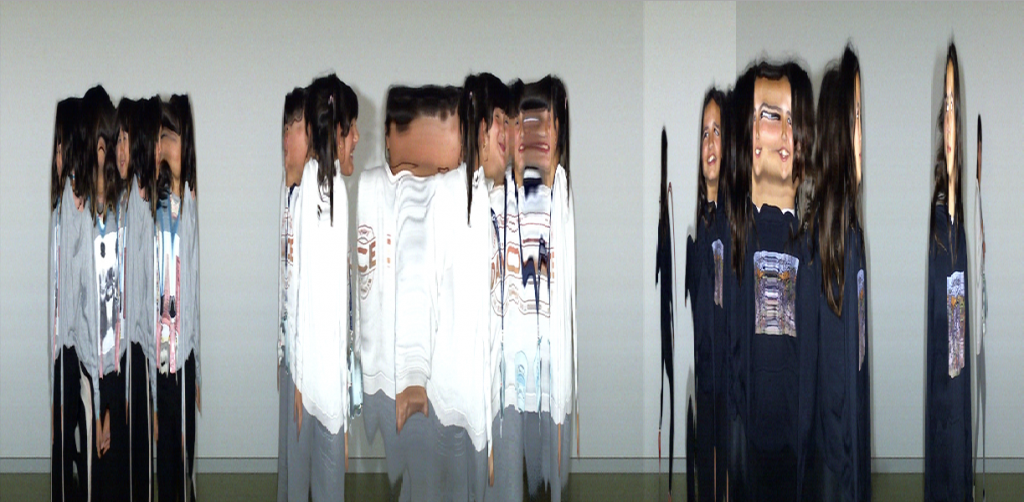
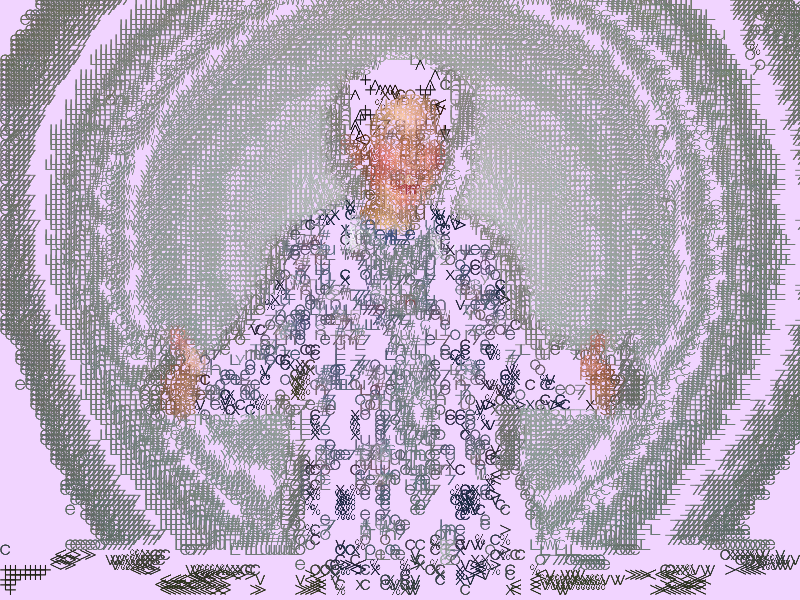
The second part of the workshop consisted of experimenting with some sketches demonstrating generative and interactive art functions that I adapted for optical interaction. I used contrast detection and brightness detection, simpler forms of detection, and from the webcam image the students interacted with particles, colors and shapes, character generators and image processing. It was a goal that each student produced at least one work, which was practically achieved except in some cases that formed group images or some young people who did not want to (3).
Some libraries used on exercises:
ControlP5 : For creating graphic interface CVImage: Use of computer vision. PeasyCam: Virtual camera control via mouse. PixelFlow: computing for fluid physics and SoftBody dynamics. Video: webcam adds ToxicLibs: simulation of force physics.
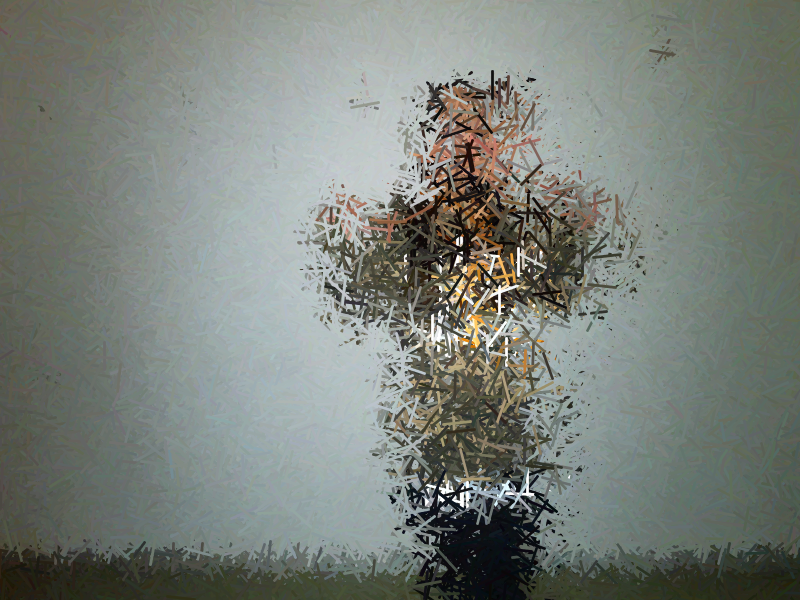
Conclusions. I think that most fifth graders are obviously enthusiastic about the technologies, maybe that’s why they seem to be interested in programming. Because their ability to concentrate on theoretical matters is small it seemed to me that the challenge is in the hands of the teacher to adapt the class programme so that it switches between passive and active learning in order to make the students’ concentration time more profitable. Initially, namely in the first session, the workshop times were not well defined which led to some indiscipline and inattention on the part of the students, especially at the end of the first part. In the following sessions I made the exhibition always with the collaboration of the young people and it went better. I chose the 5th grade for this workshop because the school program already foresees for this phase the learning of the logic of object-oriented programming and these practical workshops can help in the perception of easy reach based on motivation outside of the compulsory school setting. The programming platforms created for the arts are easy to use and belong to an open source collaborative reality and the online communities promote self-development. In addition, they not only serve the arts but extend to prototyping in a variety of knowledge areas. Through graphic applications the student can visualize how mathematics and physics work. Etc…
photo by Rosário Fernandes – CME
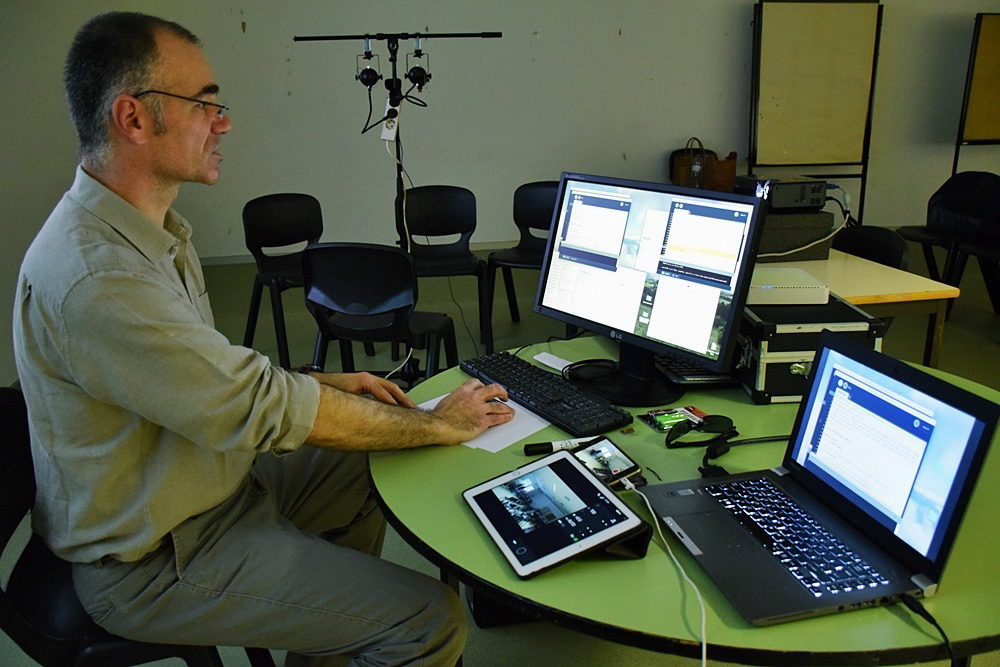
I used two computers, one for the programming and control process and one for transmitting the screen with the programming. Two video projectors, a webcam and its lighting.
My thanks to all the school staff who supported us unreservedly and always available, to teachers Lina Bolas and Carmen Alvalade who coordinated the agenda at the school. Thanks to the WEC staff who fostered, supported and accompanied the process of these workshops, namely Susana Russo and Rosário Fernandes. I think it was a valuable experience, the students showed interest and at the end of each session I heard students asking me for information about the online platform which left me with a particular satisfaction.
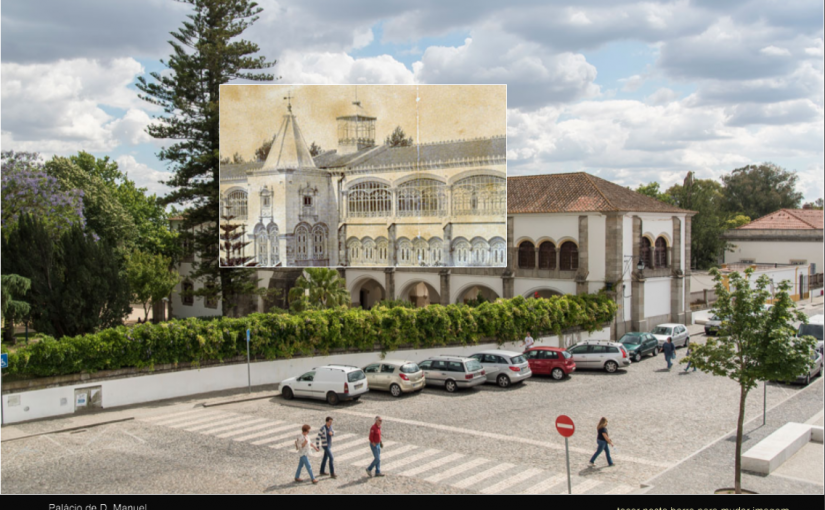
A device created as part of a multimedia artistic study project at the University of Évora. This first version you can play online is a reduced version.
Later (2015) another version was made on request of the Culture Division of the Municipality of Évora to be part of the exhibition celebrating the 500th anniversary of the Palace of D. Manuel in Évora.
Support and thanks to:
Photographic Archive of Evora City Hall Grupo ProEvora Association of Portuguese Archaeologists Sociedade Harmonia Eborense (Society) Institute for Research and Advanced Training and School of Arts of the University of Evora Cármen Almeida Francisco and Manuela Bilou
2. Continue with options: for official Pi keyboard install English-US
3. Update repositories for new versions of installed packages:
$ sudo get-apt update
4. Or, update everything to the new versions:
$ sudo apt-get upgrade
(can be single command: apt-get update && apt-get upgrade)
Configuring using the console:
$ sudo raspi-config
1. Enable SSH (in the example output is being set to 2, which is HDMI. Setting the output to 1 switches to analog-jack. The default setting is 0, which is automatic.)
$ amixer cset numid=3 2
From the setup screen > advanced options > audio (HDMI or Analog)
To be able to access a USB flash with the project’s data files. (e.g. audio or video):
Instalar usbmount:
$ sudo apt-get install usbmount
Assigning URL’s to the USB (the PEN´s title must be the same) e.g. Processing:
$ player = new SoundFile(this, "/media/pi/USB4GB/audiofile.aiff");
HARDWARE:
Power Switch:
Turning off the Pi safely at the end of the day/session: shutdown/reset button: https://www.hackster.io/glowascii/raspberry-pi-shutdown-restart-button-d5fd07
1. Add folder and python´s file: mkdir Scripts cd Scripts touch shutdown_pi.py
2. Go auto-run for the script: $ sudo nano /etc/rc.local
3. Add this line before the last instruction exit 0 *: python /home/pi/Scripts/shutdown_pi.py &
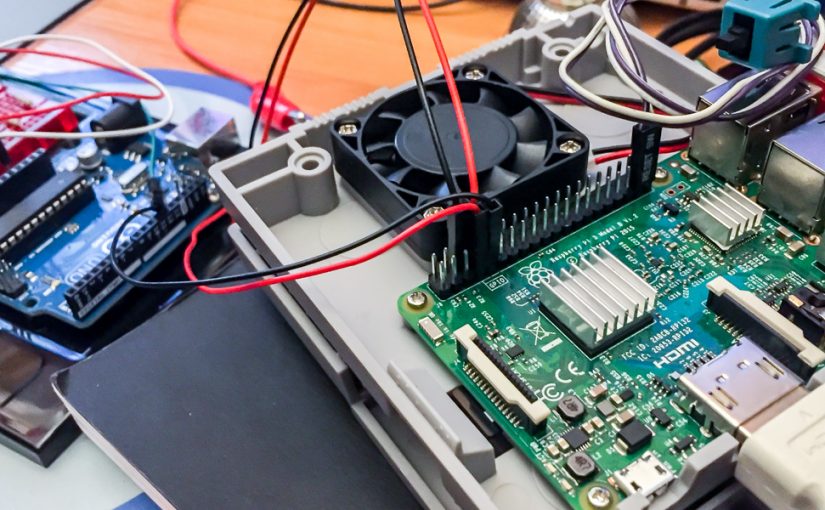
This article describes the development of a pulse dialing telephone reader and audio sample player (poems – each digit a poem). A challenge proposed to me by Carlos Moura-Carvalho, author, for an artistic installation in three commercial establishments of cultural concept in Lisbon.
Decadic signalling was used to send information – numerical data, or more simply binary code – from the telephone to the automatic telephone exchanges. Originally this signalling is generated by a “disk” which opens and closes the circuit periodically generating a series of pulses according to the number selected on the telephone disk.
This was telephone technology in my youth, which increased my enthusiasm to embrace the project.
FIRST STUDY:
Besides knowing these phones systems from a young age, the idea of a pulse reader-interpreter didn’t seem difficult to me to get through using a microprocessor like Arduino or Raspberry Pi. Coding counting loops of change-of-state in the raspberry ports, a simple binary job. On the other hand, when studying the matter depply, I reminded that these devices were powered by electric current through the line, between 2.5V and 5.5V, values very close to those used by Arduino and Raspberry controllers, however there’s capacitors on the circuit to generate 250V peaks to trigger the bells. Yes, I could set some diodes but put it simple and avoid risks, and since I had no purpose of ringing the phone bells, I choose to make use of the internal connectors, to obtain the simple analog pulses of interruption/continuity, we should say, in a passive mode. This way have discarded the possibility of using the internal circuit and only use the mechanics of the pulsing dial.
pulse ports and bell
electronic scheeme founded inside
test chart
After squeezing the circuit, and measured resistance values at various ports, it turned out that changing the connections at the output ports would have what I needed: Sending the pulses to Pi and returning the sound to the phone headset via a single cable. Therefore I’ll be needing 4 wires. So I chose CAT6 network cable (6 wires), the required was short length so interference isolation is dispensable.
HARDWARE:
Pulse Reader port
Headphone port (I wanted internal connections, no external cables, so I soldered contacts on the 3.5mm TRS case conductors of the analog audio jack)
Power supply for fan
Port for status LED
Port for shutdown switch (to shut down the system daily without flash memory problems)
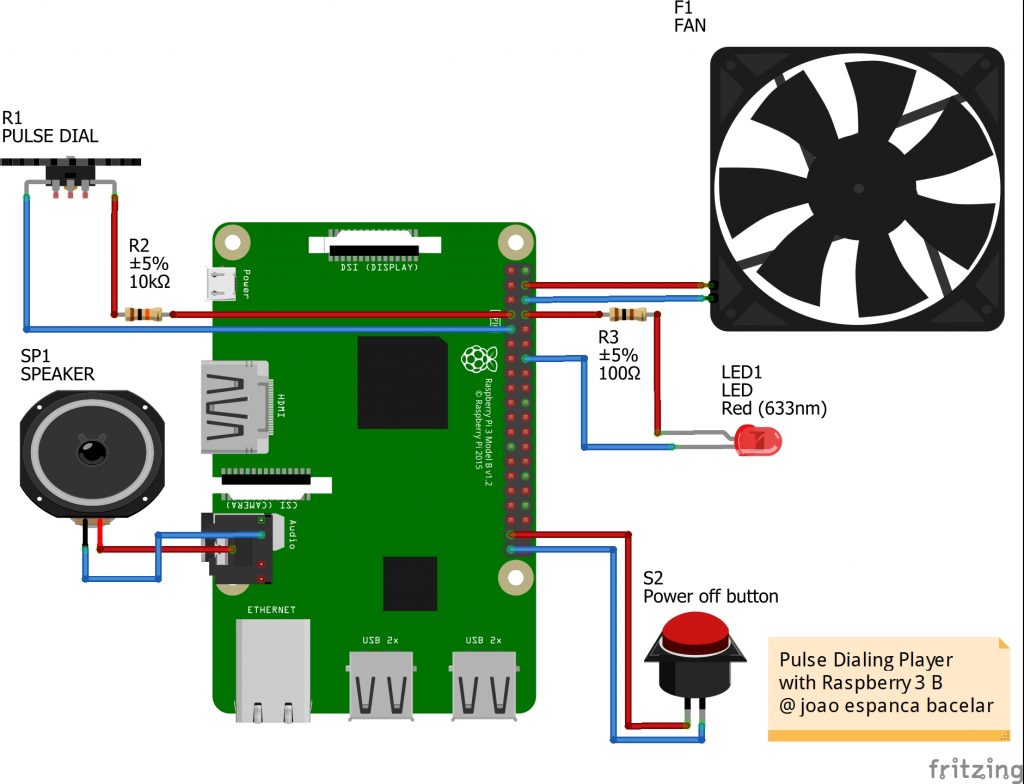
the plan
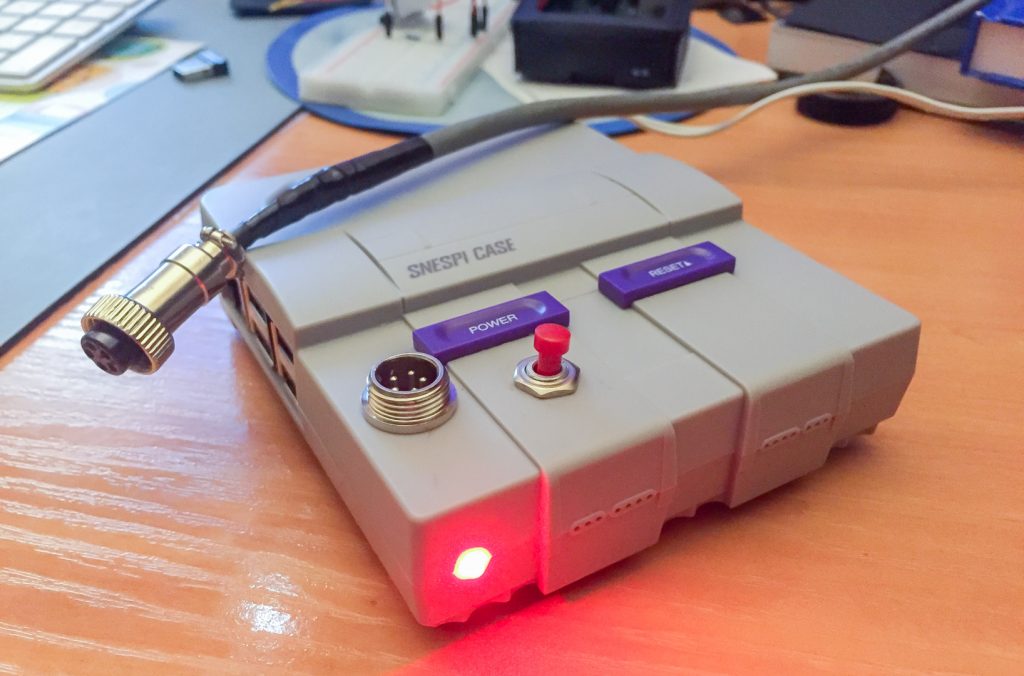
I added a small resistance of 10KΩ to the pulse reader port to ensure that the open state value was practically infinite. The fact that there are no internal connections to analog audio made me suggest to the Raspberry community to include this feature in a next update. It would be very welcome for users and would be very simple to incorporate, almost at no additional cost. The cooling fan came with the SNESPI Raspberry case which ensures peace of mind to operate during the summer. The current consumption increase is very small (100mA). As such I opted for direct connection, without setting any speed/temperature controller.
Switching off the system could create problems, because Raspberry doesn’t have a switch, the project doesn’t include a screen or access interfaces and the power cut could happen when some flow to the SD card takes place leading to the loss of information. It have already happened in a video-art installation, fortunately I was close by and was able to quickly replace the system SD with the backup one. So based on this project and added a Shutdown button that triggers a system shutdown routine and turns off all the software befora power off. We are warned by an LED, which goes off when it shuts down, and we’ll know when to turn off the power. It was based on this other project with a few minor changes.
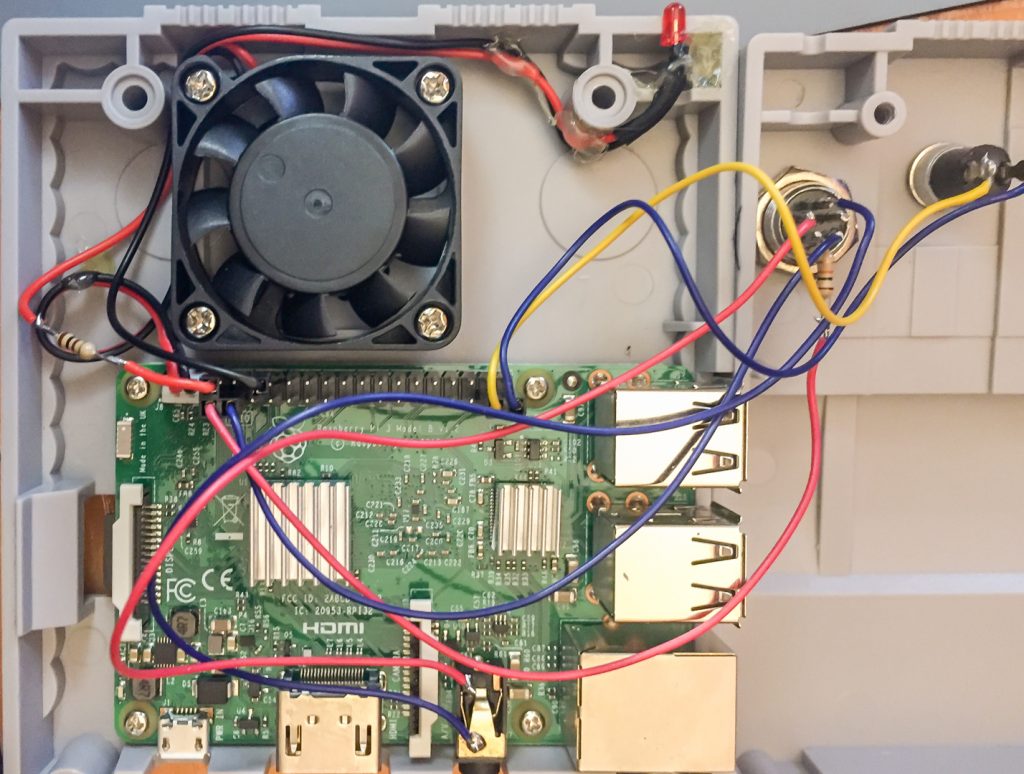
electronic circuit
Assembly
_________________
The second step was aimed at creating the software for communication with the Raspberry (3B) ports, for which the following issues had to be resolved:
SOFTWARE:
Pulse and sample player program.
Start the pulse player with an auto-run right after starting the operating system.
Allow the use of a USB stick for later modification of the audio samples.
Routine shutdown button and warning LED.
The operating system I used was the Raspbian (2019-04-08-raspbian-stretch), I have more Raspbian configuration details in this article: Raspberry Pi Tips. I could have used the Raspbian version without visual interface, lighter but anyway I only configured graphics in the initial phase to get feedback as I debugged the code. From this I eliminated the whole graphics process within the sketch. The pulse counter program was done in Processing because I’m more comfortable with the language (Java / C / C++) and had to be built practically from scratch. I found few examples of routines that solved the counting cycles issue. I needed several steps to confirm the gestures made by the user just by reading the pulses, that is:
standby 1 (OFF mode);
Lift the handset;
Issue presence signal;
Wait 2 (ON mode);
Mark a series of pulses;
Check that the series has ended;
Use the last value of the series to trigger the respective sample;
Restart the wait 2. or
Close – start waiting 1.
I’m posting the code forward with comments so not going into detail here but I’ll mention a few points from solving the pulse-counting issue using loops:
The first loop checks whether the handset is on rest or a pulse is happening (GPIO.HIGH). If it is confirmed, it increases the off_time variable and restarts the on_time variable. At second loop checks if off_time is greater than 20 (value I calculated to be above the time range between dialer pulses):
if yes, assumes the phone was hunged up, pauses the presence tone and resets the flag, count and off_time variables;
if it is not greater than 20 and the flag is equal to 0, increases the number of count and the flag goes to 1 (true) .
if (GPIO.digitalRead(4) == GPIO.HIGH) {
off_time++;
on_time = 0;

if (off_time >= 20) { // more than 20: DOWN

  if (playertone.isPlaying()) {
    playertone.pause();
  }
  flag = 0;
  count = 0;
  off_time = 20; // stop adding numbers
}

if (off_time < 20) { // less then 20: COUNT
  if (flag == 0) {
    count ++;
    flag = 1;
  }
}
}
If the headset is up (GPIO.LOW), then it passes the off_time variable and flag to false. It checks if the time between on and off was greater than 20 and passes the count value to the variable that will choose the audio sample to play switchPoema.
if (GPIO.digitalRead(4) == GPIO.LOW) {
      off_time = 0;
      flag = 0;
      }
 if (on_time > 20) {
      on_time = 0;
      }
    on_time++;

    if (on_time > 10) {
      switchPoema = count;
      count = 0;
    }
The remaining code can be seen in the file itself and there’s comments in it. I leave here the summary and attachments:
Multimedia technologies with plastic interventions.
March 13, 2019
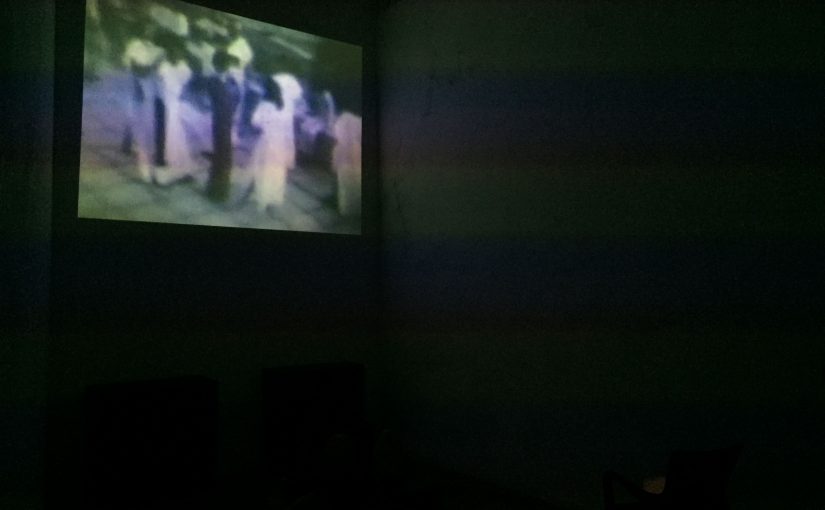
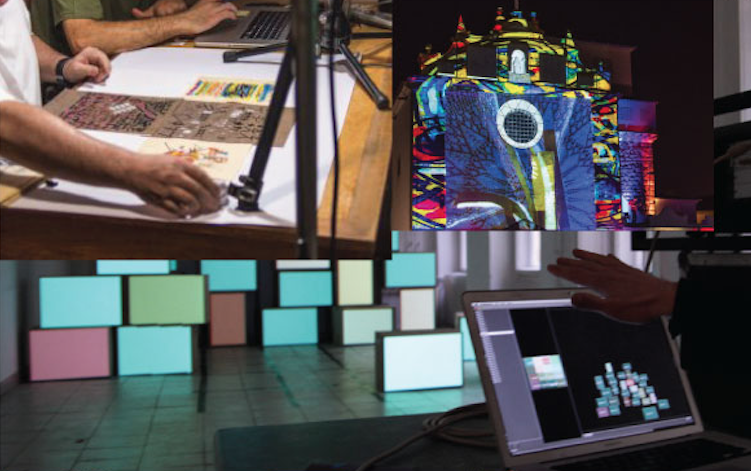
After the presentation of the event “O Cante Acusmático de Pias” with videomapping on the façade of the Church of Salvador, at the opening of the arts program Artes à Rua (Évora, July 12, 2018), a performance was executed using plastic arts techniques to provide a multimedia act of organic characteristics. It have resulted in real-time dynamic action, a performance sense that tries to bring multimedia, formerly conditioned in its digital and virtual conditions, closer to the human field, improvised, tactile and emotional.
In the continuity of our artistic program we find it to be essential to pass this practice in order to arrive at new forms in the hands of many, which brings us to this workshop in response to the project of ‘Évora – Educating City – Artes a Escola’ (Arts to School), which we hope will be quite fruitful .
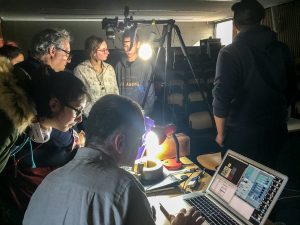
On this day some teachers and students of the arts courses received us and we had the joy of sharing knowledge and trying out new forms of expression.
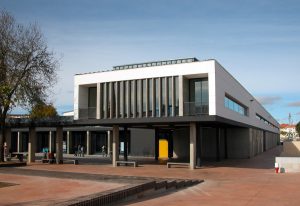
E.S. Gabriel Pereira (foto do agrupamento)
Equipment we have been using:
Camera DSRL ( Canon 550D – USB to computer)
Tripod or rack that allows the camera to be fixed vertically over the table
Computer with extra monitor output (we used a macbook)
Camera Live: Software for streaming cameras (mac)
Syphon: Program for live image transmission between applications
Camtwist: Software for real-time video effects
VPT: video mapping and control software (with image, video, syphon)
Table with area for plastic performance
Illumination from at least 2 sides, of white light (+6.000 k)
Projector video (10,000 lumens to event) (4,500 lm) lenses according to the projection distance (Throw ratio)
Rehearsal room for the videomapping “O Cante Acusmático de Pias”
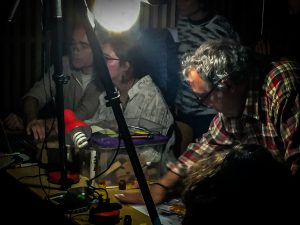
We were very pleased with the interest and imagination of the group of students who attended the workshop. In the theoretical introduction we were able to describe our missive of experimentation, which is based on the search for plastic acting in the technological forms of expression. We have described in some detail methods and the technological paraphernalia with its sequence of connections.
Some theoretical approach to the history of this type of performative art, namely in relation to the local universe that also has had its artists that accompanied artistic movements outside borders.
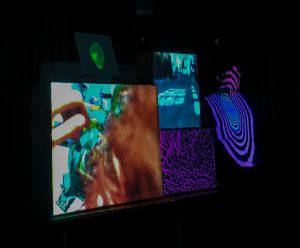
Netx, we went to the experimentation with students in which very interesting visuals were produced, using such different media as acrylic to alcohol inks, paper, oils on water, body projection and have build a small stage mounted with different volumetrics. The images were processed in real time which allows variations on the graphic compositions produced. It is work that only reaches to its full extent if it is participatory and promote the synchrony between performers.
We hope to get the experience repeated, and we’re making contacts with other schools to extend to other students and teachers.These extra-curricular exercises brings opportunities for reciprocal formation, exchange of ideas that lead all participants to increase their creative intent, so necessary for the individual’s capacity for response in the dynamic world in which we live.
Our thanks to the teachers Leonor Serpa Branco, Ana Teresa Fialho and Jorge Firmino, also to the teacher Cristina Maia for her photographic look and to all the students who collaborated, Susana Russo and the Education Division of Évora City Hall.
A project organized following the work of the OFICINA•DO•ESPIRITO – artists collective, in my person and Feliciano de Mira.